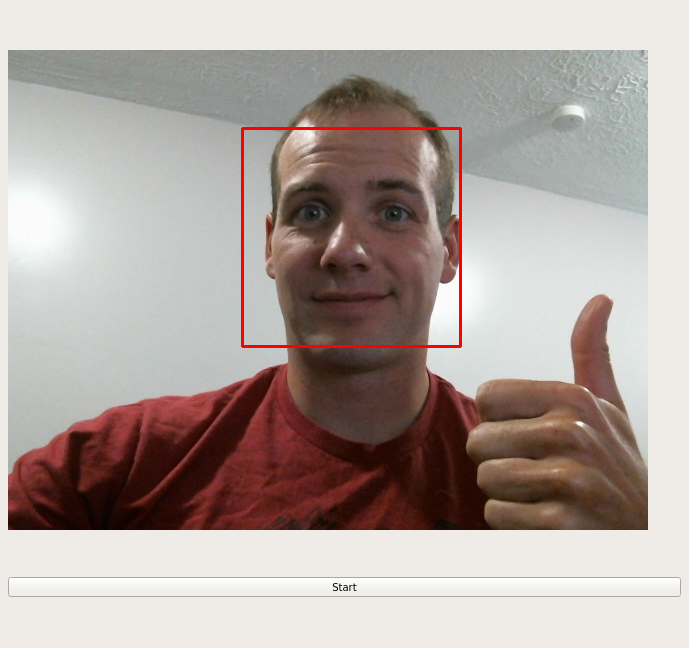
As part of our PyQt Tutorial series we’ve built a Hello World GUI application and gone through some basic Interface Design options. In this section, we’re going to implement the first type of Interface, a Single Document Interface. We’re going to create a Face Recognition Application, but since I’d like to focus on the PyQt GUI development process, the actual face recognition part will be separate from this set of tutorials.
If you’re just jumping in here, check out this link to see the code that we’re starting with.
So let’s install a face recognition ready widget.
$ pip install facerecog
And then we’ll import it into our program.
from facerecog import MainWidget, get_haarcascade_filepath
If you’re interested in seeing the coding going on behind the face recognition piece, feel free to explore it in this blog post. Otherwise, let’s instantiate our face recognition widget and put it in our program.
import sys
from PyQt5 import QtCore, QtWidgets
from facerecog import MainWidget, get_haarcascade_filepath


def main():
    # We need to make the QApplication before our QMainWindow
    # We also need to pass in our system argument values (sys.argv)
    app = QtWidgets.QApplication(sys.argv)
    main_window = QtWidgets.QMainWindow()

    # Here's that instantiation bit again.
    haar_filepath = get_haarcascade_filepath()
    main_widget = MainWidget(haar_filepath)

    # QMainWindow requires a central widget. We'll pass in our MainWidget here
    main_window.setCentralWidget(main_widget)
    # Show our main window
    main_window.show()
    # Start the event loop processing
    app.exec()


if __name__ == '__main__':
    main()
Obviously this code isn’t the whole story to the GUI development. But it demonstrates an important fact about Qt desktop GUI framework. Everything that the end user interfaces with is a widget. So in this case, since we already have a ready made widget, we can plug it in and send our user on their merry way.
The end goal for most of our interface design then using the Qt framework will be to wrap our interface into widgets. So how do we do that?
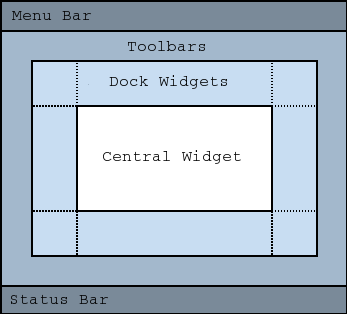
Well, as we talked about in the Hello World blog post, we can add in some functionality of a menu bar, status bar, dock widgets, etc.
But most of the time what we want to do is group, or layout, multiple widgets in an area. The way to do that in Qt is through Layout Management.
All QWidget classes use layouts to manage the life cycle of their subwidgets. In addition to managing the life cycle, ayouts also:
- Positioning of child widgets.
- Sensible default sizes for windows.
- Sensible minimum sizes for windows.
- Resize handling.
- Automatic updates when contents change:
- Font size, text or other contents of child widgets.
- Hiding or showing a child widget.
- Removal of child widgets.
Now to be clear, the Qt Documentation does an better job then I will of explaining the in’s and out’s of layout management, so I’d recommend you check it out. But we’ll go through the basics here of instantiating, using and setting layouts here.
First we need a master widget that we can set the layout on.
import QtWidgets

class MasterWidget(QWidget):
    def __init__(parent=None):
        super().__init__(parent)
Then we need to pick which layout that we want to use.
Some of my favorite layouts include QHBoxLayout which arranges widgets horizontally, QVBoxLayout, which arranges widgets vertically, and QGridLayout which allows you to put things in a grid.
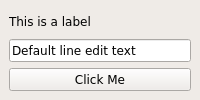
Let’s use a layout to stack a couple of widgets on top of each other. We’ll do this using the addWidget function on our instantiated layout. Once we’ve added all of the widgets that we want, we’ll then set the layout using the setLayout method on our MasterWidget class.
import QtWidgets

class MasterWidget(QtWidgets.QWidget):
    def __init__(self, parent=None):
        super().__init__(parent)
        # Create a label, push button and line edit widgets
        label = QtWidgets.QLabel('This is a label')
        run_push_button = QtWidgets.QPushButton('Click Me')
        line_edit = QtWidgets.QLineEdit('Default line edit text')

        # create our layout, a vertical layout
        layout = QtWidgets.QVBoxLayout()
        # add widgets
        layout.addWidget(label)
        layout.addWidget(line_edit)
        layout.addWidget(run_push_button)

        # set the layout of our master widget
        self.setLayout(layout)
This is the resulting gui for the above code, showing all of the widgets stacked vertically.
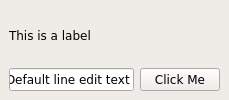
We could also use a grid layout. The API for that is a little different. Whenever we add a widget, we need to pass in the row and the column. I’m going to do this using key word arguments so that you can see what is going on. If we remove the row and column key word arguments, this would still be valid code, as these are the positional arguments as well.
layout = QtWidgets.QGridLayout()
# add as row 0, column 0
layout.addWidget(label, 0, 0)
# add as row 1, column 0
layout.addWidget(line_edit, 1, 0)
# add as row 1, column 1
layout.addWidget(run_push_button, 1, 1)
Below, you can see the change in the appearance of our GUI with the above layout changes.
Layouts are a powerful way to add more widgets and control how those new widgets look in our GUI, so don’t be afraid to use them!
Wrapup
You can catch the source code for the tutorial up to this point here.
There’s only one problem with our GUI currently. If we click that push button, nothing happens. What’s up with that? Well we need to connect our signals and slots together. Check out how to do that, in the Signals and Slots post. Or, if you’re already familiar with how signals and slots work, feel free to skip ahead using this index of the entire tutorial.
Comments !